

Hey database explorers:
How could you avoid using DBeaver in your CnosDB journey? Let me teach you step by step how to do it once and for all.
Connect to CnosDB through DBeaver
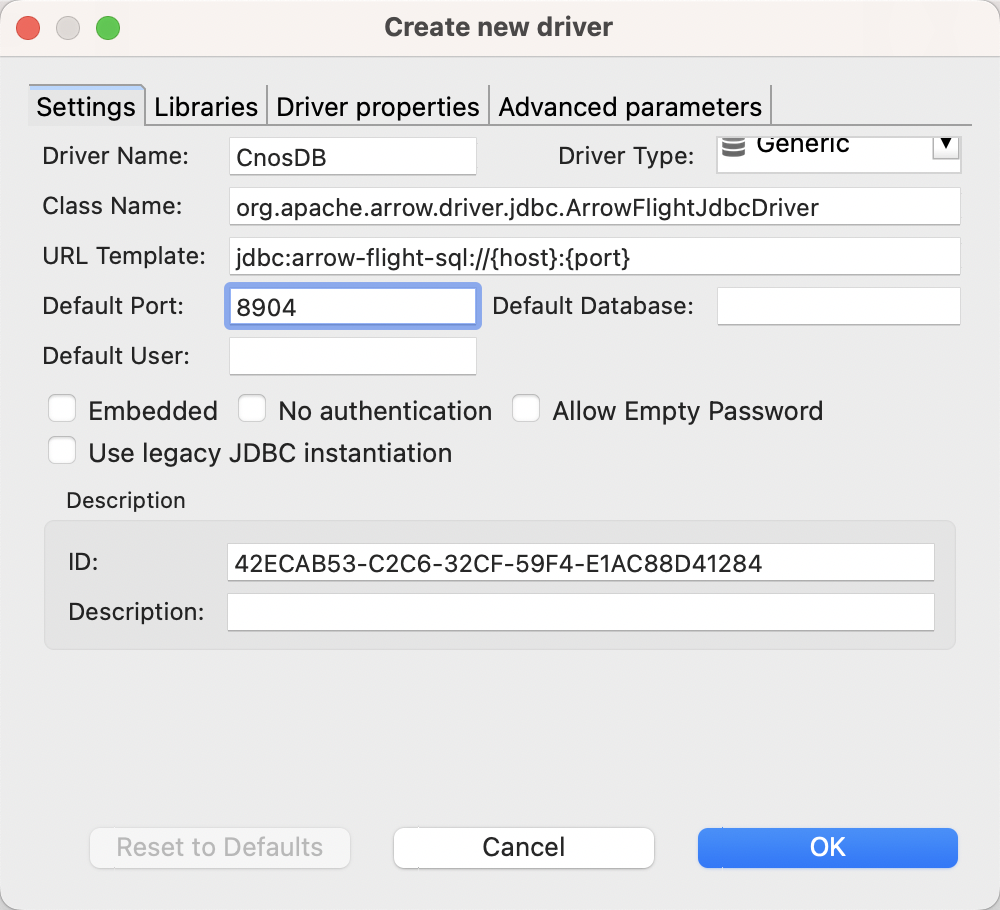
1. Add driver


2. Create CnosDB connection
Now, let's open the door to CnosDB:

1.Connect by selecting Host .
2.Host fill in the IP of CnosDB, for example: 127.0.0.1 .
3. Fill in the port 8904 , remember not to make a mistake.
4. Don’t forget to write Username and Password .
5. Go to the Driver Setting tab and right-click on User Properties. Create a new attribute named useEncryption and set the value to false .
6. Click Test Connection…. If successful, a small connected pop-up window will pop up. Click OK to close it.
7. Hey, remember to fill in the correct host address and port. If the test connection is successful, you are done!
8. Finally, click Finish .
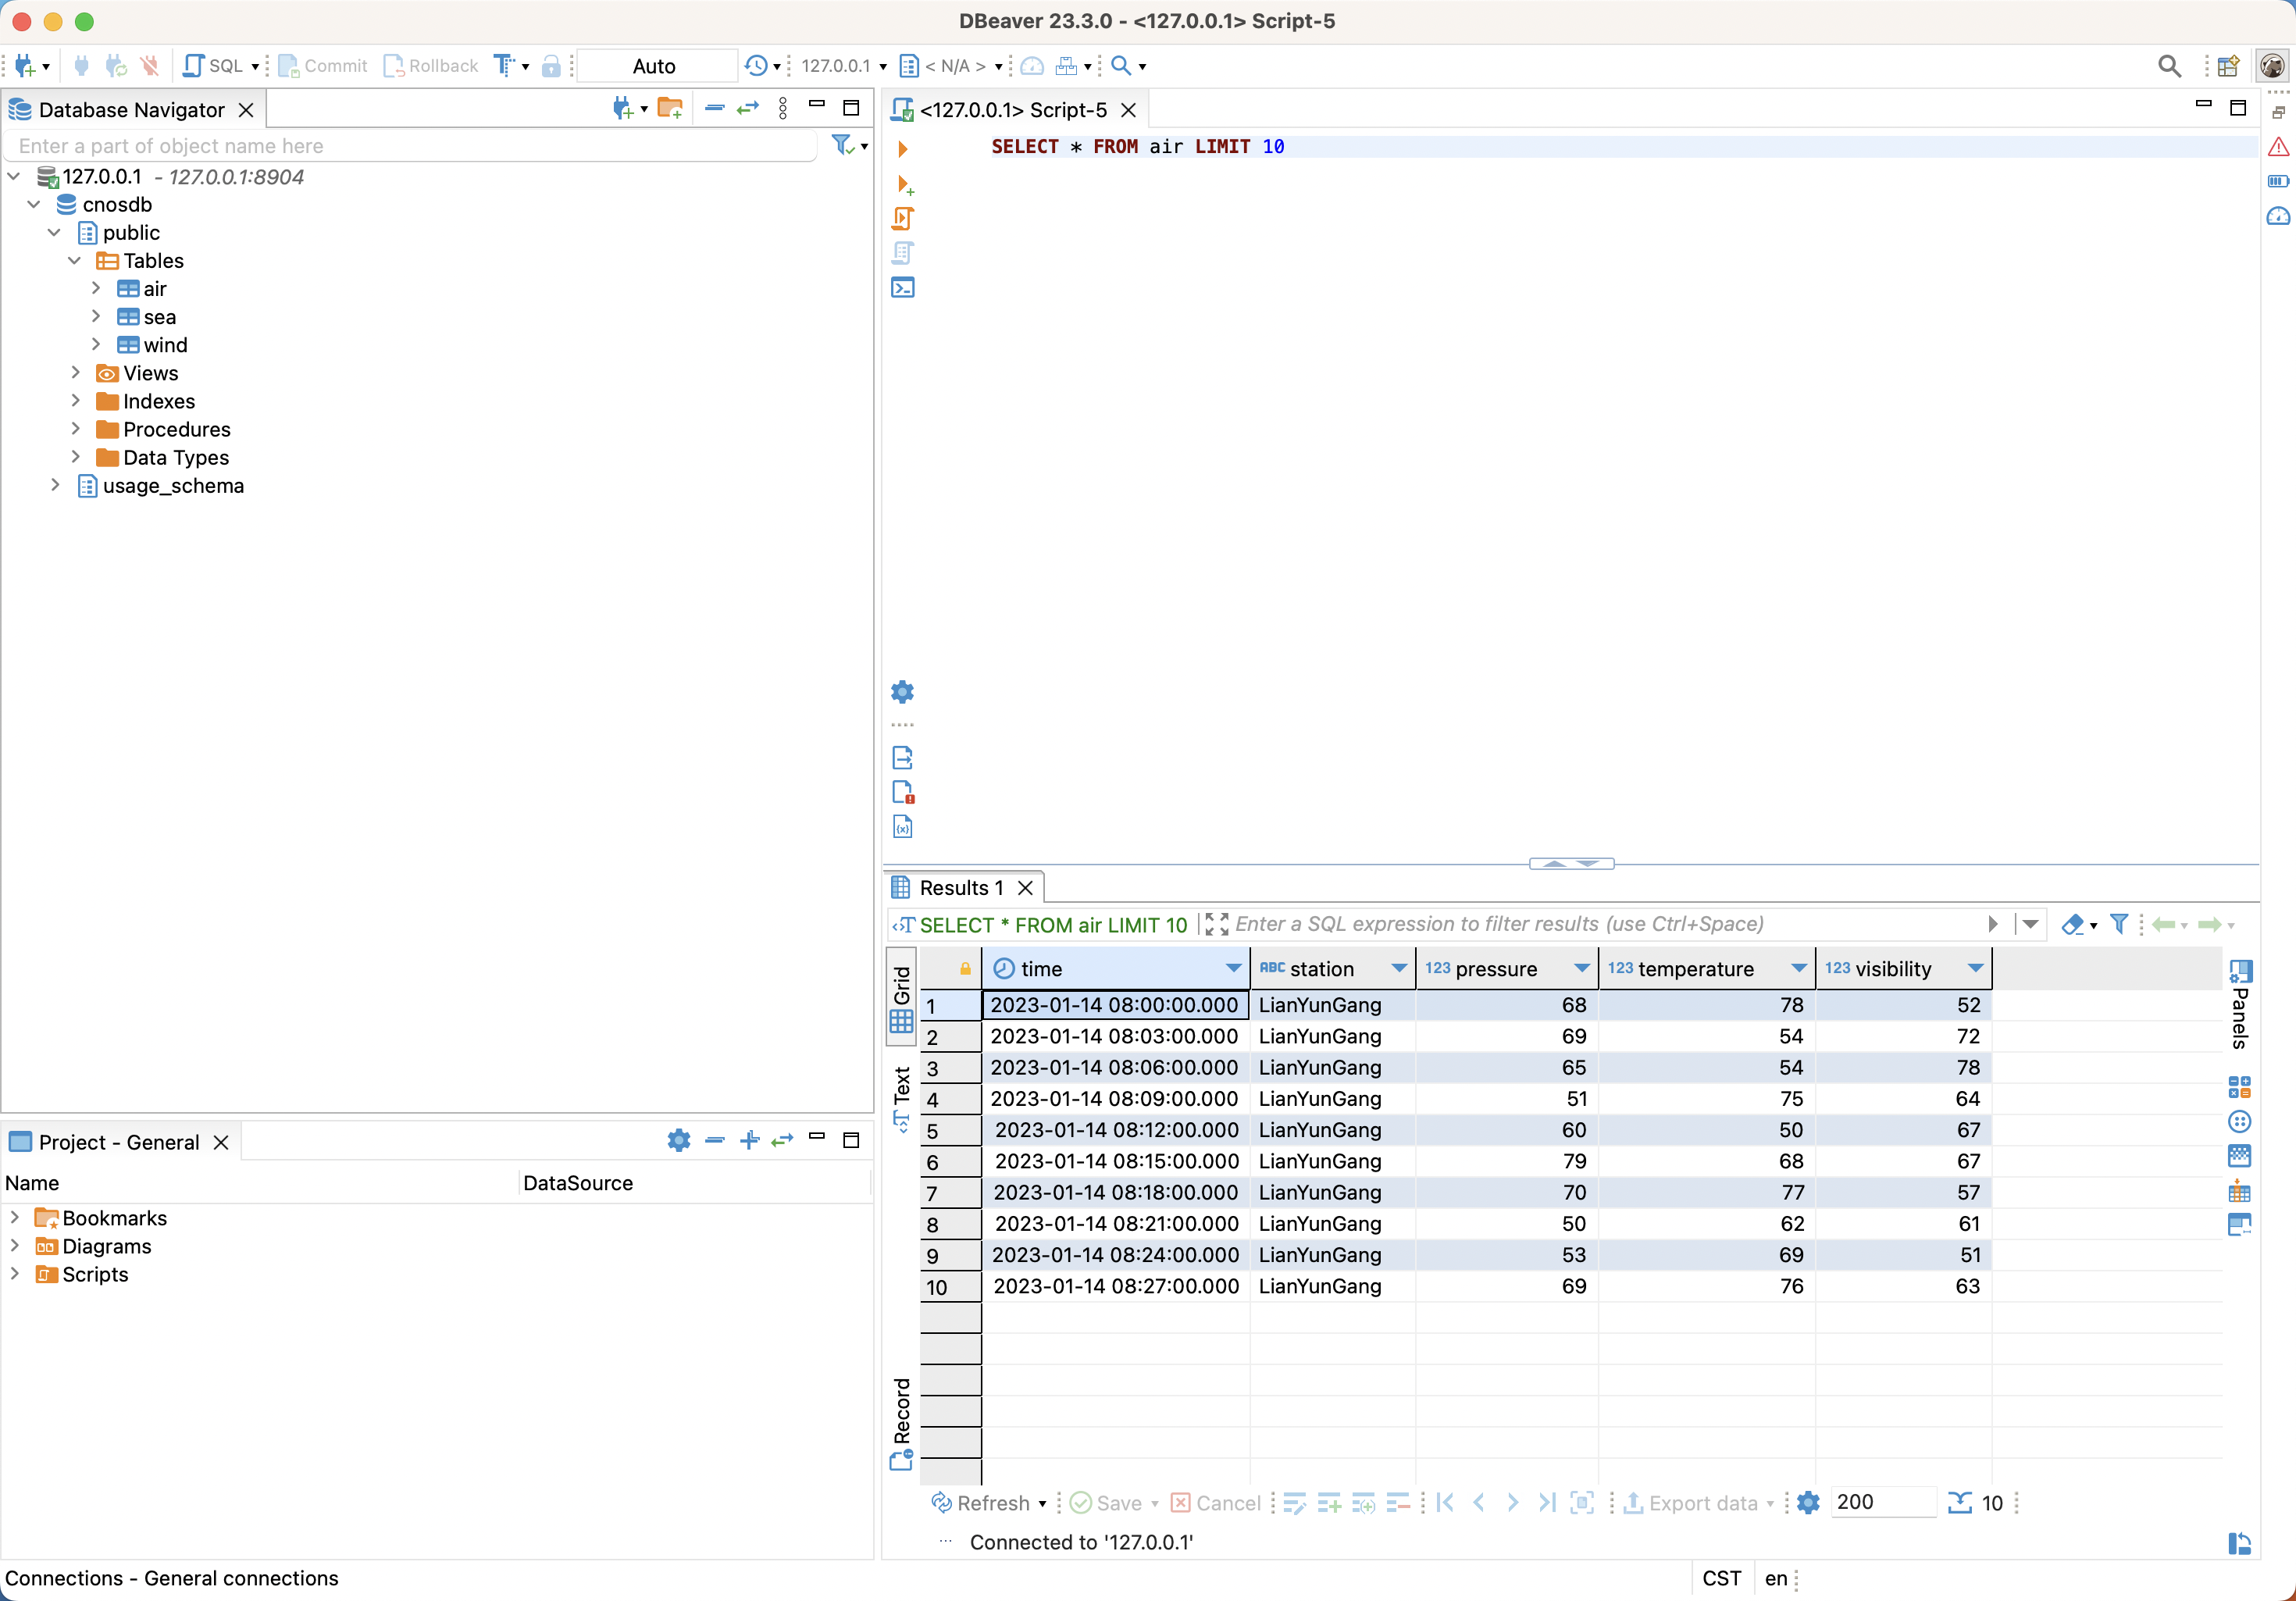
9. Now, you can query the data in DBeaver.
I hope this article helps you in your database adventure. Keep rocking, data warriors!